ClashNodes
Vue 实现骨架屏(skeleton)
Vue实现骨架屏的步骤:
1.安装骨架屏插件:
npm install vue-skeleton-webpack-plugin2.由于骨架屏插件依赖服务端渲染,再安装vue-server-renderer
npm install vue-server-renderer3.在src>components新建skeleton目录,里面创建index.vue跟entry.skeleton.js,如下图: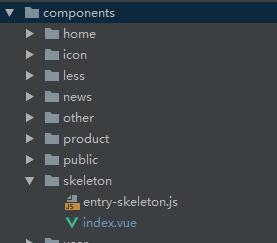
4.在index,vue中写入骨架屏的样式,通常与首页的布局一致,例如:
<template> <div class="skeleton"> <section></section> <div class="center"> <ul class="dec"> <li v-for="n in 2" :key="n"> <span></span> <span></span> </li> <li> <span></span> </li> </ul> <ul class="features"> <li v-for="n in 3" :key="n"> <i></i> <span></span> </li> </ul> </div> <div class="detail"> <ul> <li v-for="n in 3" :key="n"> <span></span> <span></span> </li> </ul> <p></p> </div> </div> </template> <style lang="less"> @import "../less/public"; @skeleton:#eee; .skeleton{ width: 100%; height: 100vh; overflow: hidden; background: #fff; section{ width: 100%; height: 205px; background:@skeleton; animation: sport .2s; } .center{ .dec{ li{ width: 100%; height: 34px; margin: 30px 0; padding: 0 @padding20px; box-sizing: border-box; display: flex; justify-content: space-between; span{ width: 100px; background: @skeleton; } } li:first-of-type{ height: 44px; } } .features{ display: flex; align-content: center; li{ flex: 1; text-align: center; i{ display: inline-block; width: 60px; height: 60px; background: @skeleton; border-radius: 50%; vertical-align: middle; } span{ position: relative; left:-20px; top:-6px; display: inline-block; width: 120px; height: 40px; background: @skeleton; } } } } .detail{ margin-top: @padding20px; ul{ li{ width: 100%; display: flex; height: 44px; padding: 0 @padding20px; box-sizing: border-box; justify-content: space-between; margin-bottom: 10px; span{ width: 300px; background: @skeleton; } span:first-of-type{ width: 150px; } } li:first-of-type{ height: 54px; } } p{ width: 60%; height: 54px ; background: @skeleton; margin-left: @padding20px; margin-top: @padding20px; } } } @keyframes sport { 0%{background: #fff} 100%{background: @skeleton} } </style>5.配置entry.skeleton.js的入口文件:
import Vue from 'vue' import Skeleton from './index' export default new Vue({ components: { Skeleton }, template: '<Skeleton/>' })6.在build文件夹中创建一个webpack.skeleton.conf.js:
'use strict'; const path = require('path') const merge = require('webpack-merge') const baseWebpackConfig = require('./webpack.base.conf') const nodeExternals = require('webpack-node-externals') const config = require('../config') const utils = require('./utils') const isProduction = process.env.NODE_ENV === 'production' const sourceMapEnabled = isProduction ? config.build.productionSourceMap : config.dev.cssSourceMap function resolve(dir) { return path.join(__dirname, dir) } let skeletonWebpackConfig = merge(baseWebpackConfig, { target: 'node', devtool: false, entry: { app: resolve('../src/components/skeleton/entry-skeleton.js') }, output: Object.assign({}, baseWebpackConfig.output, { libraryTarget: 'commonjs2' }), externals: nodeExternals({ whitelist: /\.css$/ }), plugins: [] }) //important: enable extract-text-webpack-plugin,让颜色生效 // 重点配置 skeletonWebpackConfig.module.rules[0].options.loaders = utils.cssLoaders({ sourceMap: sourceMapEnabled, extract: true }) module.exports = skeletonWebpackConfig7.在webpack.dev.conf.js跟webpack.pro.conf.js或者统一在webpack.base.conf.js中分别引入:
const SkeletonWebpackPlugin=require('vue-skeleton-webpack-plugin');然后在plugins中分别导入:
new SkeletonWebpackPlugin({ webpackConfig: require('./webpack.skeleton.conf'), quiet: true, }),以上为Vue项目骨架屏的全部配置过程!!!
热门文章
- java集成pdf.js实现pdf文件在线预览
- 2月15日|Clash/V2ray/SSR/Shadowrocket每天更新21.4M/S免费节点订阅链接,Clash便宜机场订阅
- RestTemplate中文问号?
- 1月25日|Shadowrocket/V2ray/Clash/SSR每天更新21M/S免费节点订阅链接,Clash便宜机场订阅
- 详解盒子模型和div布局
- 2月2日|Shadowrocket/SSR/Clash/V2ray每天更新22.5M/S免费节点订阅链接,Clash便宜机场订阅
- 1月11日|Shadowrocket/SSR/Clash/V2ray每天更新21.9M/S免费节点订阅链接,Clash便宜机场订阅
- 1月7日|Shadowrocket/Clash/V2ray/SSR每天更新20.2M/S免费节点订阅链接,Clash便宜机场订阅
- Pytorch单GPU、多GPU训练的几个细节对比
- 动物医院的拼音怎么拼写(动物医院的拼音怎么拼写的)